cPanel is a Linux-based web hosting control panel that features a graphical interface and automated tools that helps to facilitate the process of hosting a website.
cPanel works on the basis of a three-tier structure that offers excellent services for resellers, administrators, and website owners to control the key aspects of websites through a standard web browser. cPanel can work either as a virtual private server (VPS) or dedicated server. The latest version of cPanel can help in the restoration of full functionality of cPanel account along with email accounts, websites, MySQL databases and other cPanel requirements.
In this tutorial, we will help you transfer your cPanel accounts and perform complete cPanel backup and restore it in a different VPS or dedicated server.
Let’s begin
- Before you begin the process of cPanel backup, ensure you have enough disk capacity to backed up cPanel files.
- Then, follow the steps below to start the full cPanel backup process.
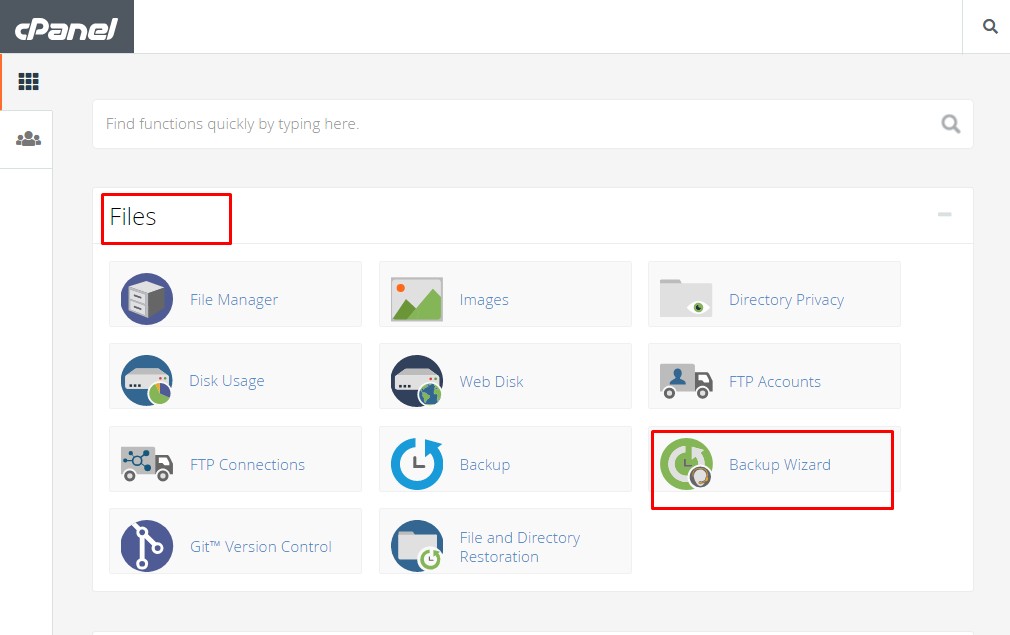
- Start by logging in to the cPanel admin area.
(Normally https://yourdomainname.com:2083. - Navigate to Files, and click theBackup Wizard
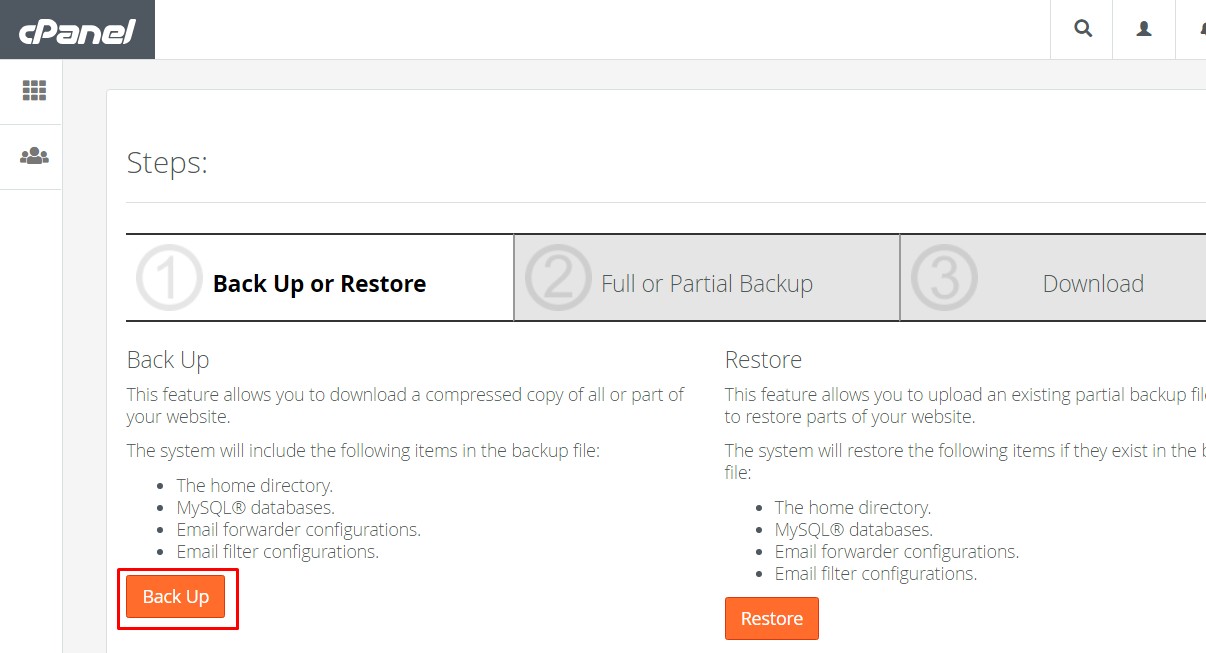
- On the Backup Wizardpage, press the Backup
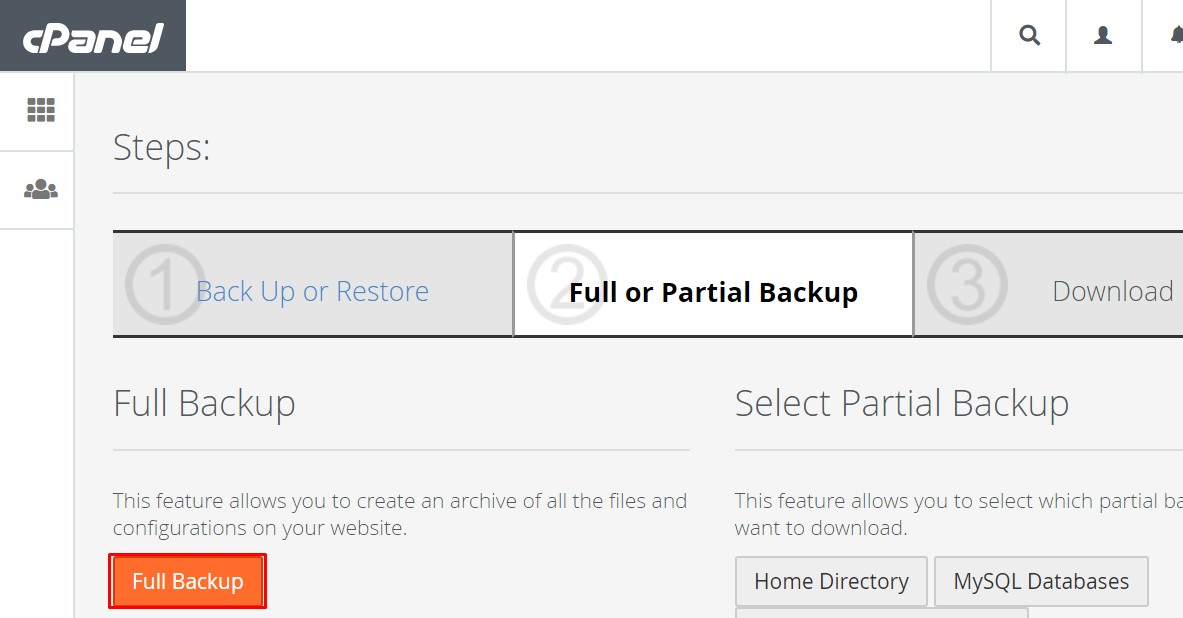
- Then, tap the Full Backup
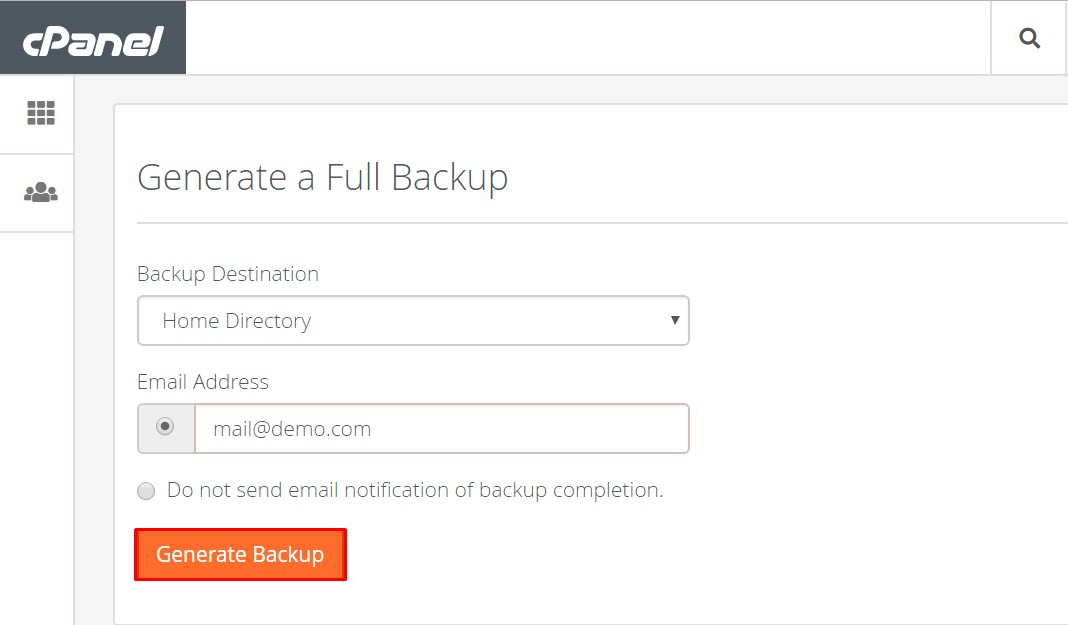
- At this point, you need to choose a location for your backup files. Select Home Directory. You can choose the Remote FTP server and SCPoptions depending on the remote settings. Tap the Generate Backup button to start the backup. This process may take a while based on the size of your cPanel account. After the backup is done, make sure you download a copy to your machine (see the third step in the image above.)
- Having completed the backup process, transfer these files from the shared host server to the virtual private server or dedicated server through FTP. Again, before you begin the restoration process for your backup, ensure you have set enough disk capacity on your server.
- After uploading your backup file, transfer it to/homedirectory.
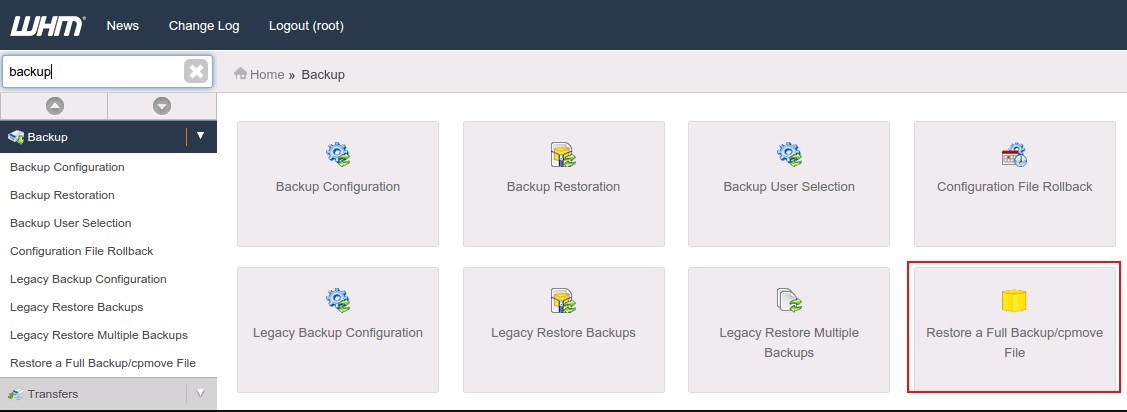
- The next step is to login to WHM or the control panel for administering a server. On this window, navigate to the Backupsection and choose the Restore a Full Backup/cpmove file option.
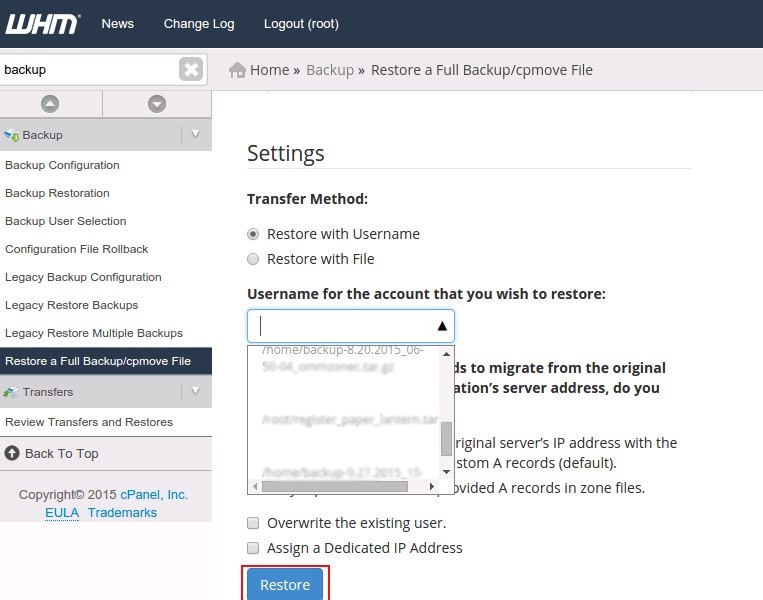
- Now go to the Settingspage and make sure that theRestore with Username section is still marked. Go to the drop-down menu and choose the already backed up file then tap the Restore button to begin the restoration process. The process may take a couple of minutes based on the size of the cPanel account.
- When the process of restoring the backup file is done, access your site with a temporary URL
- If the process is successful, go ahead and change the nameservers.
