Every time you send an email to an institute or any reputed company, you may receive an auto-generated email, and it's mentioned not to reply to it.
You may be wondering if you can apply such a feature for your email address. Well, if you have a cPanel account, you can use your custom email address to set up an auto responder for your domain.
The best part is that you don't need to worry about the platform you use, to build your website, its platform independent. All you need is a cPanel account.
It's necessary to notice that I am not talking about setting up an auto responder your Gmail email address, it's for your custom email address, which consists your domain name.
It's evident that you have a contact us page on your website, which allows your readers to contact you. Sending an automated email to their query is an excellent idea.
You may send an email to contact them as soon as possible, within 24 hours, or something similar. In this tutorial, you require the use of cPanel at its best.
Configure Your Custom Email and Set Up its Auto responder
Before you do anything, you should check that your custom email is ready, without it, you can't set up an autoresponder. I mean, for what you will save the settings.
For example, your custom email address is support@example.com; you need to set it up, correctly.
Now, it's time to learn the step by step process to accomplish your main task. Follow the steps.
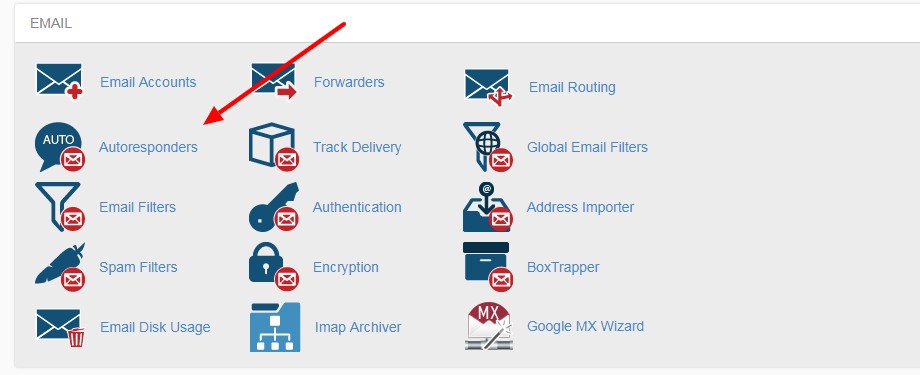
Step 1:
Login to your cPanel account and search for the Email section, click on the Autoresponders' icon to open its settings.
Step 2:
On this new page, you can see your current autoresponders. But you need to add new, so choose your domain name from the drop-down menu showing below "Managing."
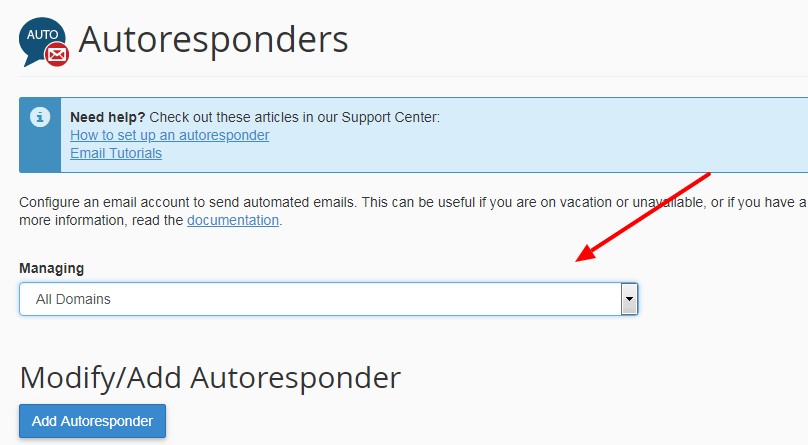
Click on the AddAutoresponder button.
Step 3:
You can see tons of settings.
- Character Set -By default it's, utf-8, don't change it
- Interval -The number of hours to wait between responses to the same email address
- Email -It's the custom email, for which, you're going to set up an autoresponder
- Domain -It's the domain name you have chosen in the previous step
- From -You can use any other email address here, but I recommend you use the same custom email address
- Subject -Fill a subject line, for example, "Natasha is out of town, she will contact you soon."
- HTML -If you want to add HTML, you can check the box, otherwise, no need
- Body -This is the box to enter your autoresponder message
- Start - You can choose to start an autoresponder immediately or prefer a custom time
- Stop -You can select a custom date to stop your autoresponder
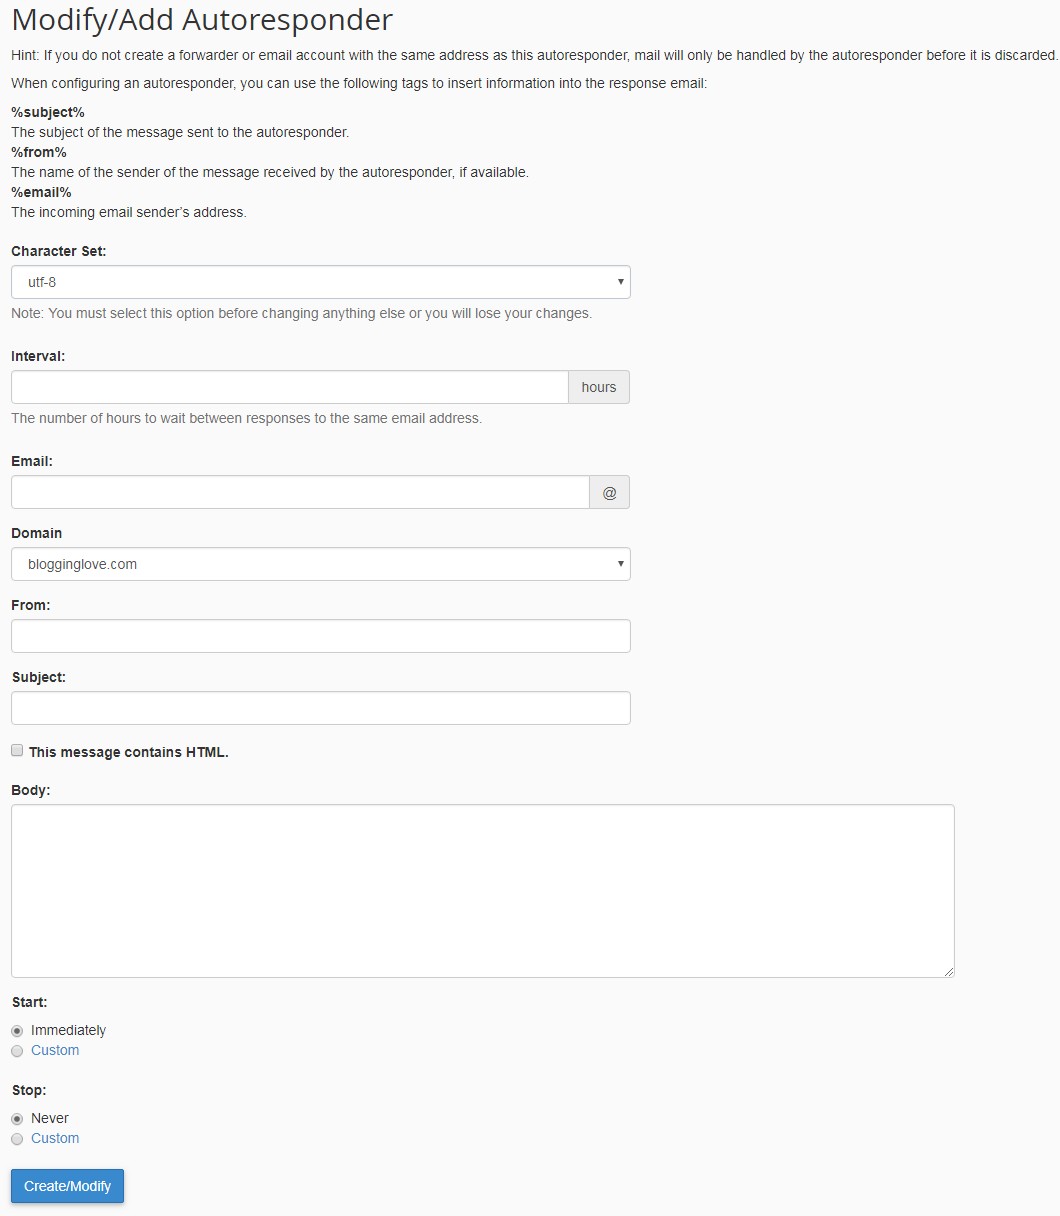
After filling all the fields, click on the Create/Modify button.
You can see a message "You have successfully created an autoresponder," it means your task is over.
The best news is that you can use an autoresponder for multiple custom email addresses. Sometimes, you may have the email address for the different section of your office.
